How to clean camera sensor is a task many photographers face, especially those who frequently change lenses or shoot in dusty environments. A clean sensor is essential for capturing sharp images free from distracting dust spots or streaks. It’s important to proceed cautiously, as improper cleaning can damage the sensor. This guide provides detailed step-by-step instructions to help you clean your camera sensor safely and effectively.
Understanding the Camera Sensor
What is a Camera Sensor?
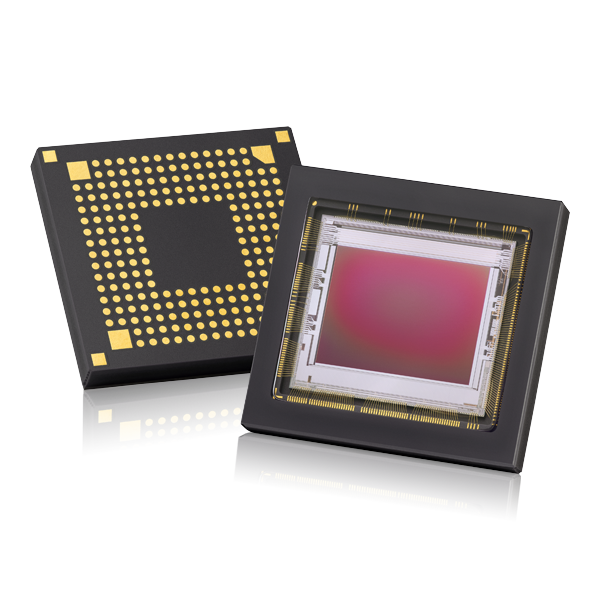
The camera sensor is a crucial component of digital cameras. It converts light entering through the lens into electronic signals, which are then processed to create images. Sensors come in various sizes, with full-frame and APS-C sensors being among the most common types. Over time, tiny particles such as dust, dirt, or hair can settle on the sensor’s surface. These particles can interfere with image quality, leading to spots that can mar perfectly composed pictures.
Importance of Cleaning
Regular cleaning of your camera sensor is necessary to maintain optimal image quality. Dust and debris can accumulate on the sensor, especially when changing lenses or shooting outdoors. Even the tiniest particles can become more visible when shooting at smaller apertures (high f-stop numbers), leading to unwanted artifacts in your images. Understanding this foundational knowledge lays the groundwork for why proper cleaning is essential for photographers, whether they are professionals or enthusiasts.

Preparing for the Cleaning Process
Gather Your Supplies
Before you begin cleaning the sensor, gather all necessary tools to ensure you don’t disrupt the process once it begins. Here is a list of items you will need:
- Sensor Cleaning Kit: This typically includes sensor swabs and cleaning solution specifically formulated for camera sensors.
- Air Blower: A manual air blower helps remove loose particles without risking contact with the sensor.
- Microfiber Cloth: This soft cloth is useful for cleaning other parts of your camera without scratching surfaces.
- Tweezers: If your sensor cleaning kit does not have swabs, you may need tweezers to handle the swabs safely.
Having everything assembled and ready will streamline the cleaning process and minimize the chance of mishaps.
Find a Safe Cleaning Environment
Choose a clean, dust-free environment for the cleaning process. Ideally, this should be indoors, away from open windows and sources of dirt or dust. A clean tabletop or desk where you can comfortably work is essential. It’s also wise to avoid areas with pets or excessive foot traffic. The goal is to maintain a controlled environment that minimizes the risk of additional debris contaminating your sensor while you clean.
Preparing the Camera for Cleaning
Remove the Camera Battery
Before starting any cleaning procedure, ensure that your camera is powered off. Additionally, removing the battery helps prevent the camera from accidentally turning on during the cleaning process. If the camera engages while the sensor is exposed, it could result in moving parts being damaged or unexpected risks. Taking this precaution protects both the camera and sensor during cleaning.
Set to Sensor Cleaning Mode
Many digital cameras come with a sensor cleaning mode. This option locks the mirror up (on DSLRs) or holds the shutter open (on mirrorless models), exposing the sensor for cleaning. Consult your camera’s user manual to find instructions on how to activate this mode. Once you have activated this setting, you may proceed with extreme caution.

Using the Air Blower
Blowing Away Loose Dust
Before touching the sensor, use an air blower to remove any loose particles. Hold the camera upside down, allowing gravity to aid the process. Position the air blower’s nozzle about two inches from the sensor surface, and give it a gentle squeeze to release a burst of air. It is crucial not to use compressed air in a can, as this can introduce moisture and chemicals that may damage the sensor.
As you continue to blow the air, be mindful to avoid touching the sensor directly with the air blower. The goal here is to lift away any dust or debris that may linger without requiring physical contact. This initial step is key to minimizing potential scratches or damage during the cleaning process.
Checking for Remaining Particles
After using the air blower, take a moment to inspect the sensor visually. You may use a torch or flashlight to illuminate the sensor surface better. Look for visible specks or spots that remain. If the air blower successfully removed these particles, you can proceed to the next step. If you still see contaminants, it may be necessary to go further in cleaning the sensor.
Cleaning the Sensor with Swabs
Choosing the Right Swab
If dust or debris remains on the sensor, it’s time to use the sensor cleaning swabs. Make sure to select the appropriate size swab for your specific sensor type. Different camera sensors require different swab sizes, so consult your cleaning kit’s guidelines. Using the wrong size could lead to ineffective cleaning or, worse, damage.
Always handle the swabs by the edges to prevent oils from your fingers contaminating the cleaning surface. This careful handling helps ensure that your cleaning process is as effective as possible, minimizing the risk of introducing further debris.
Applying Cleaning Solution
If your cleaning kit includes a sensor cleaning solution, apply a few drops to one end of the swab. It is essential not to over-soak the swab, as excess liquid could run into the camera body, causing potential damage. The swab should be damp enough to clean the surface but not dripping.
Cleaning Technique
When cleaning the sensor, use a gentle motion to avoid scratching the surface. Begin your cleaning stroke on one side of the sensor and make a smooth, controlled pass across its width to the opposite side. Use a light touch and avoid applying excessive pressure. After the first stroke, make a second pass with the clean end of the swab or a new swab if necessary.
Once completed, visually inspect the sensor again. Check for any remaining particles or streaks. If necessary, repeat the process using a fresh swab. Always ensure your movements are slow and deliberate, allowing the swab to make full contact without risk of movement that could cause unwanted scratches.

Final Inspection and Reassembly
Inspecting the Sensor
After you have cleaned the sensor, use a flashlight or lens to inspect the surface one last time. Look for any remaining dust or streaks. If the sensor looks clean, you can proceed to reassemble your camera. If you notice any persistent particles, consider repeating the cleaning process with a new swab or a soft microfiber cloth to remove the last traces.
Reconnecting the Camera Components
Before reassembling the camera, remember to turn it back off. Remove the sensor cleaning mode setting, allowing the camera to return to normal operation. Reinsert the battery and ensure that any lens caps or covers are securely attached. If you have removed other accessories during the cleaning process, ensure they are put back correctly.
Take care to handle your camera gently throughout the reassembly process. Ensuring everything is in place confirms the safety and functionality of your device long after the cleaning process is complete.
Maintaining a Clean Sensor
Frequency of Cleaning
How to clean camera sensor? Once your camera sensor is clean, it’s essential to maintain it proactively. Depending on your photography habits and environments, you may need to clean the sensor every few months or after specific shooting sessions. If you frequently change lenses or shoot in dusty conditions, carry out cleaning more regularly.
Pay attention to your images. If you notice unusual spots when reviewing photos, it may be time to clean your sensor again. Regular maintenance will help ensure that your gear remains in good condition and that your photographs are not compromised by dirt or dust.
Storing Your Gear Properly
Finally, proper storage of your camera can help prevent the accumulation of dust on the sensor. When not in use, keep your camera in a protective bag or case. Avoid leaving it in environments with high dust levels, such as attics or garages. Additionally, consider using lens caps on both the camera body and the lens itself to minimize exposure to contaminants.
By following these practices and implementing proactive measures, you can enjoy a cleaner sensor and improved image quality. This routine maintenance will ensure that your photography experience remains enjoyable, producing crisp and clear images without unwanted distractions.
In conclusion, cleaning a camera sensor may seem daunting, but with the right preparation and tools, it can be an efficient process. By understanding the importance of the sensor, gathering necessary supplies, and following these detailed steps, you can maintain your camera’s performance. Regular cleaning will help you capture stunning images, free from dust and debris, so you can focus on what truly matters: your creative vision.
